When I first stumbled into the idea of no-dig landscape edging, I was skeptical. Could a border really look professional and stay put—without trenching or backbreaking work? But after trying it in my own yard, I was pleasantly surprised at how neat, effective, and forgiving it can be. In this post, I’ll share not just how to install no-dig edging in minutes, but also trade-tested tips, pitfalls to watch for, and design ideas so your landscape looks sharp and lasts long.
What Is “No-Dig Landscape Edging”?
No-dig edging refers to border materials that can be installed without—or with minimal—excavation. Rather than digging a trench 6–8 inches deep (as with many conventional edging systems), you often lay the edging on the ground’s surface and secure with stakes, spikes, or anchoring systems.
Types include:
- Plastic/polyethylene no-dig edging (flexible strips or coil)
- Metal no-dig edging (steel strips with pre-drilled stake holes)
- Rubber or recycled-material interlocking edging
- Composite or hybrid systems designed to “snap” or interlock
Advantages include faster installation, less root damage, and easier adjustment later. But there are trade-offs—durability, warping, and anchoring strength are real considerations (more on that below).
When and Where No-Dig Edging Makes Sense (and When It Doesn’t)
Ideal Scenarios
No-dig edging is especially appropriate when:
- You’re working around existing plantings or tree roots you don’t want to disturb.
- The terrain is fairly level (or with gentle slopes).
- You want a quick DIY border upgrade without heavy equipment.
- You foresee potential layout changes in the future.
- You prefer lower labor costs upfront, even if some maintenance may be needed later.
Situations to Avoid or Use Caution
It may not be ideal where:
- Soil is extremely rocky—stakes can’t penetrate.
- Significant elevation or level changes are present.
- You need a high edge (e.g., to retain deep mulch or heavy gravel).
- You require a permanent, rigid border (e.g. for driveways or heavy foot traffic).
- In windy or flood-prone zones where loose edging could shift.
One landscaping professional cautions:
“No such thing as no dig edging … plastic edging always sucks … never again.”
That may be hyperbole, but it underscores the importance of good anchoring, material choice, and realistic expectations.
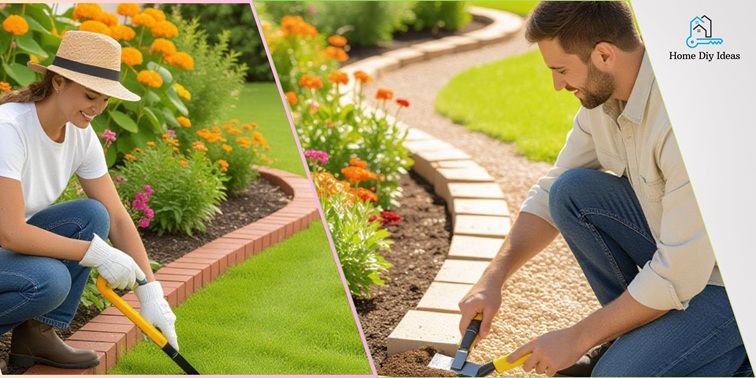
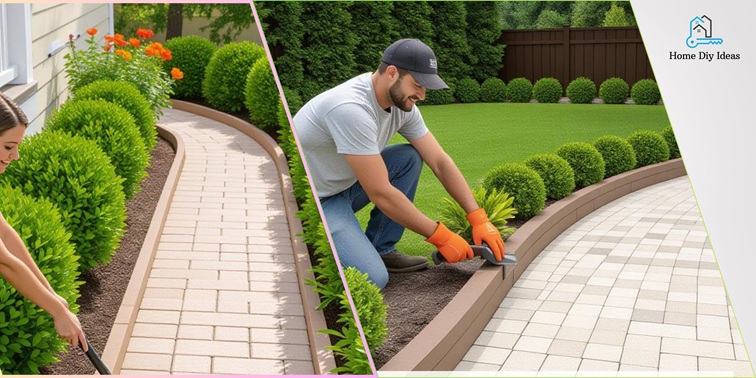
How to Install No-Dig Landscape Edging (Step by Step)
Here’s a practical, homeowner-friendly workflow I use in my own garden. You can probably install 20–30 linear feet in a couple of hours once you get the rhythm.
Materials & Tools You’ll Need
- No-dig edging strips/coils (plastic, metal, or rubber)
- Anchoring stakes or spikes (usually included, but consider extras)
- Rubber mallet (or hammer with soft face)
- Tape measure, stakes & string (for layout)
- Garden gloves, safety glasses
- Utility knife or tin snips (for cutting edging)
- Level (optional)
- Garden rake and soil to backfill lightly
Pre-Installation Planning
- Sketch your border line. Use stakes and string or a garden hose to mark the curve or shape you want.
- Clear the edge zone. Remove sod, weeds, rocks, and debris along the border line.
- Check slope and grade. If there’s a steep drop, you may need a tiny bevel or regrade to avoid tilting.
- Lay out the edging material. Uncoil or lay strips along your border path and allow them to naturally relax into the shape (sun exposure helps soften the material).
Installation Process
| Step | What You Do | Tips / Notes |
| 1 | Position edging flush to the lawn side, overlapping ends as needed. | Leave about 1/8–¼″ above soil for mower clearance. |
| 2 | Temporarily pin or hold it in place | Use temporary garden pins or weighted objects so it doesn’t shift. |
| 3 | Insert the stakes | Drive stakes through the pre-cut holes or designated areas—usually every 12–24 inches is a good spacing. Use a rubber mallet. |
| 4 | Adjust alignment | After anchoring a few, step back and view from distance to correct bends or waves. |
| 5 | Backfill lightly (optional) | Use soil or mulch to lightly butt up against the border’s lawn side to stabilize it. |
| 6 | Clean up & mow line | Trim any excess or overhanging material; mow over gently to see if the line is crisp. |
Some installers recommend placing more stakes near curves or high-exposure areas to resist shifting. In forums, users often mention warping over time if stakes are too sparse.
Design Techniques & Tips That Make a Difference
1. Pre-warm or soak plastic edging
Plastic edging straight from the roll can tend to curve or warp. Lay it in the sun or wrap it loosely for a day so it relaxes before staking.
2. Use extra stakes in critical zones
Even if the manufacturer suggests stakes every 24″, I’ve found placing them every 12–18″ in curves or near walkways prevents flexing.
3. Overlap and interlock ends properly
When joining two sections, overlap or match interlock tabs in a consistent orientation to keep tension even across the run.
4. Hide stakes when possible
On the planting bed side, slope soil slightly so stakes are less visible. Or paint stakes to match edging material.
5. Trim precisely
After staking, go back with tin snips or a utility blade and clean edges so you get smooth, flush joins.
Longevity & Maintenance
Even the best edging will shift or loosen over time, but here’s how to keep it looking sharp:
- Seasonal check-ups. In spring and fall, walk the edge and re-anchor any loose or popped sections.
- After heavy rains or freeze-thaw cycles. Soil heave can displace edging; just re-seat and stake.
- Weed/grass control. Mow or trim next to edging so grass doesn’t grow over it.
- Replace damaged segments. Most systems are modular, so you can swap in new lengths as needed.
- Avoid overload. Don’t push heavy mulch or gravel repeatedly against the edge—resist back pressure.
If you maintain it lightly, many no-dig systems last 5–10 years (more with premium materials).
Material Comparison & Selection Guide
Here’s a comparison of common no-dig edging materials I weigh when choosing:
| Material | Durability | Flexibility | Cost | Best Use Cases | Things to Watch Out For |
| Plastic / Polyethylene | Moderate (3–8 yrs) | High | Low | Flowerbeds, lawns, curves | UV degradation, warping over time |
| Metal (Galvanized or Powder-coated Steel) | High (10+ yrs) | Moderate | Medium–High | Formal lawns, crisp modern lines | Sharp edges, rust potential, more cost |
| Rubber / Recycled Interlocking | Moderate–High | Medium | Medium | Kid zones, mellow edges, eco builds | Flex limits on tight curves |
| Composite / Hybrid | Variable | Medium | Medium | Blends aesthetics and durability | May be pricier, limited warranty data |
In product reviews, EasyFlex no-dig edging is often highlighted for being a top-tier plastic no-dig pick for its ease and balance.
Practical Homeowner Advice
- Buy 10–15% extra material — you’ll waste a few feet cutting curves.
- Anchor in stages — stake in 20–30 ft increments, then step back and adjust alignment.
- Label curves early — put a mark on the inner curve side so you maintain consistent curvature.
- Do one side at a time — edging one half, then the next helps reduce cumulative error.
- Take photos before and after — this helps if you later shift sections and want to recall original shape.
- Don’t over-tighten stakes — going too deep can bend the edging; anchor just firm enough to resist movement.
FAQ — Common Questions About No-Dig Landscape Edging
Typically 4–6 inches of penetration is sufficient, but deeper in looser or sandy soils. Ensure solid embedment, but don’t drive so hard you deform the edging.
Yes for gentle slopes (under ~5–7°). On steeper slopes, you may need small terraces or stepped edging to maintain flush lines.
It can, especially in extreme heat or sun exposure. Mitigate this by pre-warming the coils, using ample stakes, and choosing UV-stabilized materials.
It’s more semi-permanent. With care, many systems last 5–10 years. But if you later remodel your borders, you can adjust or remove without major demolition.
Yes—if installed flush and staked solidly. Leave a slight lip (1/8–¼ inch) to prevent wheel catching, and use smooth, rounded edging profiles.
Pull it up, clean the stake hole, reposition edging, and re-anchor. In high-shift zones, add extra stakes.
Conclusion
When you finish installing no-dig edging, you’ll feel that satisfying click: your garden looks sharper, your beds are contained, and you did it yourself in just a couple of hours. That ease is the beauty of no-dig landscaping, and it lets you focus on what matters—your plants, your design, your enjoyment.
If you’d like help picking the best edging product for your soil type, climate, or design aesthetic—or even a material cost estimate for your yard—drop me a note. I’d be happy to assist you in turning your vision into a perfectly edged reality.


