When I first installed outdoor lighting around my garden, I realized how dramatically it transformed my yard—not just in beauty but in functionality. A well-planned low voltage landscape lighting kit can make your outdoor space safer, more inviting, and more visually dynamic.
In this guide, I’ll walk you through everything from understanding these systems to planning, installing, and maintaining them—plus practical landscaping and design tips most guides miss.
Understanding Low Voltage Landscape Lighting Kits
What Is “Low Voltage”?
Low voltage lighting systems operate at around 12 volts, rather than the standard household 120 volts. A transformer reduces household voltage, making the system safer, easier to install, and energy-efficient—perfect for homeowners handling their own outdoor lighting.
Main Components of a Lighting Kit
| Component | Purpose | What to Look For |
| Transformer | Converts standard voltage to 12V | Choose a model with 20–30% extra wattage for expansion |
| Low-Voltage Cable | Carries power to lights | Use outdoor-rated cable of proper gauge |
| Fixtures | Deliver the lighting effect | Weather-resistant materials (brass, copper, or stainless steel) |
| Bulbs or LEDs | Provide illumination | Opt for warm white LEDs (2700–3000K) for natural ambiance |
| Connectors & Stakes | Secure the system | Weatherproof, durable materials |
| Timer or Smart Controls | Automate your lights | Timers, dusk-to-dawn sensors, or smart integrations |
Why Choose a Kit?
Kits make it easier to get started—they include compatible components and simplify setup. They’re also modular, letting you add lights or upgrade components later.
Benefits of Low Voltage Kits
- Safety: Reduced shock risk, ideal for DIY.
- Energy Efficiency: LED systems use less power and last longer.
- Flexibility: Add, move, or adjust lights as your landscape evolves.
- Professional Look: Even basic kits can achieve a polished, custom aesthetic.
Planning Your Lighting Layout
Before installation, create a simple plan. A little prep work ensures your lights look intentional—not random.
Step-by-Step Planning Checklist
☐ Sketch your property, marking key features (house, trees, walkways, flower beds).
☐ Decide what to highlight—safety zones, focal points, or ambiance areas.
☐ Select fixture types for each area (see table below).
☐ Estimate total wattage and choose a transformer 20–30% higher.
☐ Plan cable runs, keeping wire lengths efficient.
☐ Choose the right wire gauge to prevent voltage drop.
☐ Consider control options—timers, sensors, or smart home systems.
☐ Leave room for future lighting expansion.
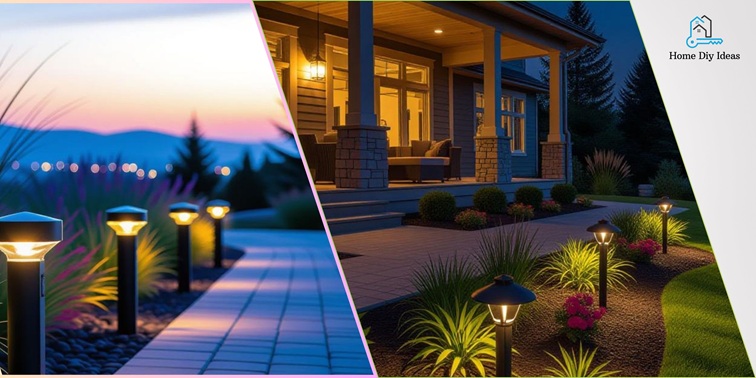
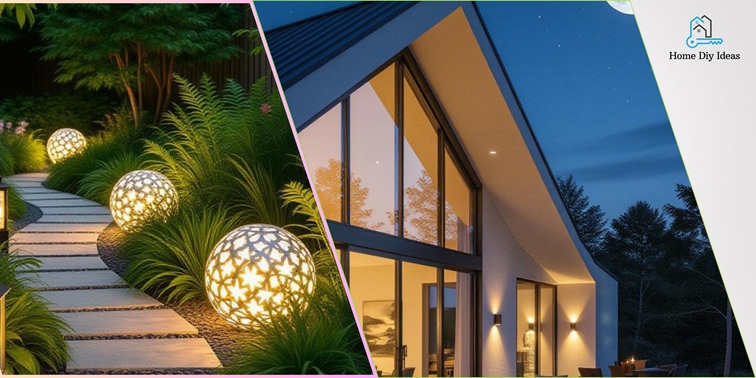
Fixture Placement Guide
| Area | Fixture Type | Placement Tips |
| Walkways | Path lights | Space 10–15 ft apart, staggered pattern for balance |
| Patios | Wash or ambient lights | Use warm light for cozy atmosphere |
| Trees | Uplights or well lights | Angle toward trunk or canopy for depth |
| Facades | Spotlights | Aim upward from 1–2 ft away for even illumination |
| Garden Beds | Accent lights | Highlight textures and colors of plants |
Wiring & Voltage Tips
- For runs under 60 ft, 16-gauge wire is fine; for longer runs, use 12-gauge.
- Keep fixture brightness consistent by avoiding overly long daisy-chain runs.
- Bury wire 6 inches deep or secure under mulch for a clean, safe finish.
Safe and Stylish Installation Steps
Even as a DIYer, you can install a low voltage lighting kit confidently.
How to Install
- Mount the Transformer:
Attach it near an outdoor GFCI outlet and ensure it’s weather-protected. - Lay Out the Cable:
Route cable along your planned zones; keep it loose until lights are in place. - Position Fixtures:
Set them temporarily, test at night, and adjust placement for best effect. - Connect Fixtures:
Use waterproof connectors and verify polarity (if applicable). - Bury or Secure the Cable:
Shallow trenching (~6 inches) is enough for most installations. - Set Controls:
Add a timer, photocell, or smart controller for convenience. - Test and Adjust:
Turn on lights after dark, tweak angles, and ensure even illumination. - Document Your Layout:
Keep a simple sketch showing where cables and fixtures are located for future reference.
Safety Best Practices
- Always turn off power before working on wiring.
- Use only outdoor-rated components.
- Avoid shining lights directly into neighbors’ windows or seating areas.
- Check that all connections are watertight and corrosion-resistant.
Landscaping Design Techniques
1. Layer the Light
Use multiple light types—uplighting, downlighting, and ambient washes—to create depth and atmosphere.
2. Highlight Textures
Angle lights across stone, bark, or brick surfaces to emphasize texture.
3. Create “Moonlight” Effects
Mount fixtures high in trees or on posts, angled down through branches, to mimic natural moonlight.
4. Use Contrast
Mix light and shadow for drama. Dark zones make illuminated areas feel more inviting.
5. Plan for Growth
Position fixtures where plants won’t block them as they mature. Leave adjustability for seasonal changes.
Maintenance and Longevity
Annual Care Checklist
☐ Clean lenses and remove dirt or debris.
☐ Check cables and connectors for wear.
☐ Inspect transformer and reset timers if needed.
☐ Realign fixtures if growth or movement shifts their angles.
☐ Replace aging LEDs to maintain brightness and color consistency.
Common Troubleshooting Tips
- Uneven brightness: Use thicker wire or balance load across runs.
- Flickering: Tighten connectors and check transformer output.
- Lights not turning on: Inspect timer, photocell, and connections.
Typical Costs and Materials
| Item | Approx. Cost (USD) | Notes |
| Basic 6-light kit | $200–$400 | Good starter option |
| Mid-range 10-light kit | $400–$800 | Better materials and expansion potential |
| Premium brass kit | $1000+ | Ideal for large or high-end landscapes |
| Additional fixtures | $40–$150 each | Price depends on material and design |
| Extra cable/connectors | $50–$150 | Plan for expansion or long runs |
Shopping Checklist
- Transformer (12 V, adequate wattage)
- Low-voltage cable (proper gauge)
- Fixtures (LED, weatherproof)
- Connectors and stakes
- Timer or smart controls
- Trenching tools and cable clips
Avoid These Common Mistakes
- Over-lighting your yard (less is often more).
- Forgetting expansion capacity when choosing a transformer.
- Using wrong wire gauge for long runs.
- Ignoring plant growth that can block lights.
- Leaving connectors exposed to moisture.
- Pointing lights directly into sight lines or reflective surfaces.
FAQ: Common Homeowner Questions
Yes. With basic electrical safety and the right tools, most homeowners can install these systems without hiring a professional.
Add up the total wattage of all lights and keep it below 80% of the transformer’s rated capacity.
Warm white (2700K–3000K) offers a natural, inviting glow ideal for residential spaces.
Around 6 inches is sufficient for protection and aesthetics.
Yes—well-planned lighting boosts curb appeal, enhances usability, and makes your home more inviting after dark.
Conclusion
Installing a low voltage lighting kit isn’t just about safety—it’s about extending your outdoor lifestyle. When you walk through your softly lit garden or see your trees glowing gently at dusk, you’ll know every hour of planning was worth it.