
I’ve always believed that the details make a garden feel complete. One simple way to infuse classic charm into any yard is with brick landscape edging. It’s durable, adaptable, and visually striking—yet many homeowners overlook its potential. In this article, I’ll walk you through inspiring ideas, step-by-step installation tips, and design strategies to help you add that stately, intentional touch to your landscape.
Why Choose Brick for Landscape Edging?
Advantages & Trade-Offs
Here’s a quick comparison to help you decide whether brick edging is right for your project:
| Advantage | Why It Matters | Trade-Off / Mitigation |
| Timeless aesthetic | Bricks suit both traditional and cottage styles | May look formal—use with curves or mixed materials for softer feel |
| Versatility in patterns | Can be laid flat, on edge, staggered, herringbone, etc. | More intricate patterns require more cutting and precision |
| Durability | Long lifespan if properly installed | Bricks may shift if the base isn’t solid—good prep is essential |
| Ease of mowing | Edges are firm and crisp | If bricks are too high, it can interfere with blade—set flush with grade |
| Moderate cost / DIY potential | Doable for homeowners with some effort | Labor intensive in curved beds or sloped sites |
According to landscape experts, brick edging is “classic and versatile” but can shift without proper base prep. With solid groundwork and good drainage, it will last decades.
Brick Landscape Edging Ideas to Add Classic Charm
Below are curated design ideas—some common, some more daring—to help you envision how bricks can frame your garden.
1. Single-Row Flat Laying (Traditional Border)
Lay bricks flat (long side down) in a single row just beneath or flush with the surface. This clean, subtle edge is easy to mow against and suits most home styles.
2. Brick-on-Edge (Vertical Border)
Stand bricks on their narrow edge to create a more prominent border. This gives stronger visual separation between lawn and bed.
3. Herringbone or Diagonal Pattern
Use a diagonal herringbone pattern within the edging itself to add visual flair. It works especially well along straight paths.
4. Curved & Wavy Lines
Soft curves help reduce the rigidity of bricks and add flow to garden design. Use keystone cuts or small segments to transition smoothly.
5. Raised Brick Edging or Retaining Walls
Stack two or more courses of bricks to create a low raised border or retaining wall—perfect for slopes or raised beds.
6. Saw-tooth or Angled Layouts
Alternate sizing or angle the bricks at intervals to create a zigzag or saw-tooth edge. This adds a quaint, handcrafted look.
7. Infill with Gravel, Pebbles, or Groundcover
Within the brick boundary, you can fill with gravel or low groundcovers to reduce maintenance. Ideal for front yard edges where turf meets mulch.
8. Mixed Material Borders
Combine brick with stone, metal, or wood to create transitions or accent zones. Use brick as the anchor, then shift materials for variation.
Planning & Preparation: A Checklist Before You Dig
Before you start lining bricks, follow these planning steps:
- Sketch a layout. Use tracing paper over a site plan or mark the edge with flexible rope or hose.
- Decide on height. Typically bricks are flush or slightly above grade. Raised borders may be 4–6″ or more.
- Estimate material quantity. Always order about 10% extra to allow for cuts or breakage.
- Check slope and grade. Ensure proper water runoff to prevent settling.
- Locate underground utilities. Always check before digging.
- Select material. Choose frost-resistant clay pavers if you live in a freeze-thaw climate.
Step-by-Step Installation Guide
Step 1: Mark the Edge
Run a taut string line or garden hose along your planned border. Mark the trench line clearly.
Step 2: Dig the Trench
Dig down about 6″ deep and slightly wider than your brick. Ensure straight, vertical sides.
Step 3: Add a Base Layer
Add 2–3″ of compacted crushed stone or paver base. Compact evenly to avoid sinking later.
Step 4: Add a Bedding Layer
Spread about 1″ of stone dust or a sand-cement mix for added stability.
Step 5: Lay the Bricks
Place bricks carefully—whether flat, edgewise, or patterned—and tap them level with a rubber mallet.
For curves, cut keystone shapes to keep a tight fit. Keep joints consistent at about ⅛″–¼″.
Step 6: Fill Joints
Sweep fine sand or polymeric sand into joints and mist lightly to settle.
Step 7: Compact and Finish
Tap bricks again, remove excess sand, and lightly hose down to finalize the joints.
Step 8: Edge Cleanup
Backfill behind the bricks with soil or gravel, sloping slightly away to prevent water pooling.
Design Tips & Mistakes to Avoid
- Don’t skip base prep. A poor base leads to shifting or uneven bricks.
- Mind the transitions. Where brick meets other materials, leave a reveal to prevent chipping.
- Be conservative with height. Too tall makes mowing awkward.
- Match brick tones. Blend colors for a cohesive look, especially with reclaimed bricks.
- Seal with care. Sealers prevent moss but can alter the brick’s natural texture. Test first.
How to Incorporate Brick Edging into Front Yard Landscaping
- Frame your walkway or driveway with a brick border for a polished, cohesive entry.
- Create symmetrical curved beds around entry points for a welcoming look.
- Edge around trees or shrubs with a circular brick border to define planting zones.
- Use stepped brick terraces on slopes to reduce erosion and add visual structure.
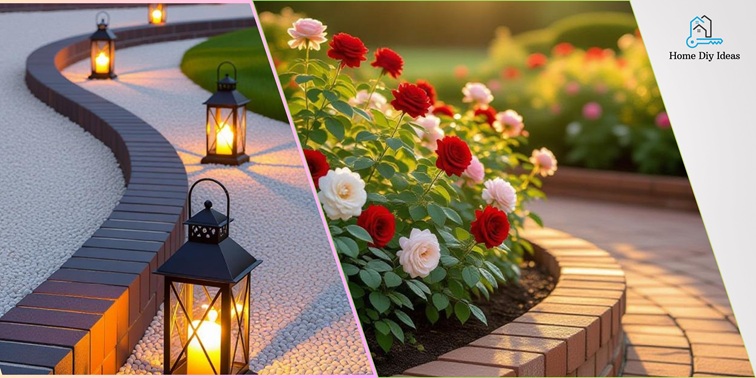
- Add path lighting or solar lights beside brick edges for nighttime appeal.
Maintenance & Longevity Tips
- Weed control: Pull early and refresh joint sand yearly.
- Re-sanding: After heavy rain or frost, check joints and top up as needed.
- Reset shifting bricks: Lift, re-level the base, and replace.
- Avoid harsh sealers: Maintain the classic redbrick patina naturally.
- Mower care: Keep edges flush with grass to prevent blade contact.
FAQ: Common Questions About Brick Landscape Edging
Yes, but step your courses or create small retaining sections to keep lines level and prevent shifting.
Use durable clay pavers rated for outdoor and freeze conditions—standard building bricks can erode faster.
For lawn-to-bed borders, 4–6″ is typical. Raised sections may need 8–12″ depending on design.
DIY projects may run around $5–10/linear foot in materials; professional installation can range $15–25 depending on complexity.
It can, especially if joints are wide. Narrow joints and polymeric sand help prevent root intrusion.
Conclusion
If you’re looking to bring classic structure and timeless charm to your garden, brick landscape edging is a simple, lasting upgrade. With careful prep and clean design, it gives your home’s exterior an elegant, well-defined look.


