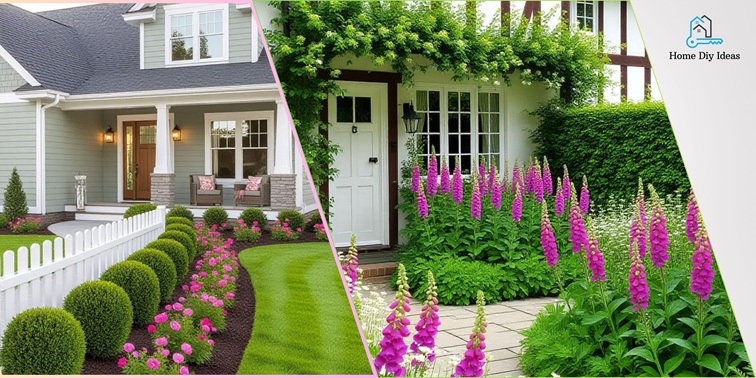
When you approach a home, your eyes don’t linger on the living room or kitchen first — they land on that stretch of grass, the entry path, the shrubs, the porch. That first impression is powerful. I’ve walked up many homes in my life (yes, I’m a total plant nerd) and I can tell you: the difference between “meh” and “wow” often comes down to thoughtful front yard landscaping.
In this post, I’ll walk you through proven, expert-backed steps to transform your front yard—boosting curb appeal immediately yet sustainably. I’ll also show you what top-ranking blogs miss (a content gap analysis) so you can get richer, more actionable insights than elsewhere.
Step-by-Step Guide to Front Yard Landscaping That Instantly Boosts Curb Appeal
Here’s a structured, phased approach you can adapt to your yard’s size, style, and budget.
Phase 0: Preliminary Site Analysis (Don’t skip this!)
Before you dig or plant, gather intelligence. Even pros spend hours here.
| Task | What to Measure / Note | Why It Matters |
| Walk the perimeter, view from street | Note angles, vantage points, what draws the eye | You’ll design for the view people actually see |
| Sun and shade mapping | Track sunlight morning to evening | Helps choose plants suited to exposure |
| Soil test (pH, fertility, texture) | Use a simple test kit | You may need soil amendments before planting |
| Water flow and drainage | Observe after rain for puddles or erosion | Prevents washouts or soggy beds |
| Existing assets inventory | Trees, shrubs, utilities, sightlines | Decide what stays vs. what must move |
Once you complete this, you’ve built a “map of constraints and assets.” Everything else builds on it.
Phase 1: Define Goals and Visual Theme
Before planting one shrub, decide what you want your front yard to feel like. This ensures cohesiveness.
Ask yourself:
- What mood/style do I want? (Modern minimalist, cottage, tropical, formal, native)
- What is my maintenance tolerance? (Weekly gardener or low-care?)
- Which features must stay? (Walkway, driveway, mailbox)
- What’s my budget range?
- Are there neighborhood or safety rules to consider?
Once you have answers, sketch or pin images showing your desired look. Use it like a design compass.
Phase 2: Build a Solid Foundation
This is where you establish structure so everything feels intentional.
2.1 Hardscape and Edge Elements
- Define edges: Use stone, metal, or low walls to separate lawn, beds, and pathways.
- Upgrade walkways and entry: Straight lines are fine, but soft curves create movement.
- Add a focal element: Try a tree, arbor, trellis, or statement planter to anchor the view.
- Light the path and facade: Use low lighting to emphasize architecture and guide visitors safely.
By finishing hardscape first, your plantings will feel cohesive, not patchy.
Phase 3: Layered Planting Strategy
Now you bring in living materials—plants—in a structured way.
3.1 Planting Layers (Back → Front)
- Structural / backbone layer: Evergreens, shrubs, and small trees that hold form year-round.
- Mid-layer / filler: Perennials, shrubs with seasonal blooms or foliage color.
- Ground layer / accent: Groundcovers, ornamental grasses, or annuals.
- Focal points: Sculptural plants, containers, or specimen trees.
3.2 Design Tips
- Use odd numbers (3 or 5) for natural groupings.
- Repeat colors and textures for unity.
- Think in viewing tiers — bold forms for distance, fine textures for close-up appeal.
- Choose climate-appropriate plants that suit your maintenance level.
- Give plants room to mature — no crowding against walls or windows.
3.3 Phased Planting Plan
If you’re on a budget, break the work into stages:
- Phase 3A: Swap a few shrubs, add containers for instant color.
- Phase 3B: Expand beds or add edging.
- Phase 3C: Add larger shrubs or ornamental trees.
Phase 4: Finishing Touches
These small details make the design shine.
- Mulch for polish: Quality mulch keeps weeds down and creates a clean look.
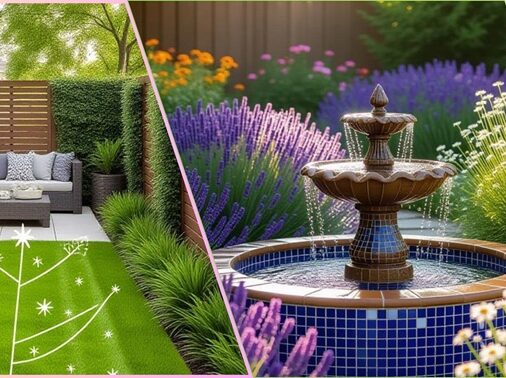
- Add accents: Sculptural rocks, birdbaths, or subtle water features add character.
- Seasonal color: Rotate bulbs or annuals for a lively touch.
- Fine-tune lighting: Highlight plants or architecture for nighttime curb appeal.
- Keep sightlines open: Always ensure the entry and windows stay visible.
Phase 5: Maintenance for Lasting Appeal
Great landscaping lasts when maintained smartly.
- Watering: Deep, infrequent watering after the first month.
- Pruning: Shape plants to prevent overgrowth.
- Lighting check: Re-aim or replace fixtures yearly.
- Refresh mulch and annuals: Maintain neatness and color.
- Review each season: Keep notes on what thrives and what needs changing.
Front Yard Landscaping Checklist
☐ Complete site analysis (light, soil, drainage)
☐ Define theme and goals
☐ Install hardscape and edging
☐ Add paths and focal elements
☐ Layer structural plants
☐ Add filler and accent plants
☐ Apply mulch and groundcover
☐ Set up lighting
☐ Include decorative features
☐ Create maintenance schedule
☐ Evaluate seasonally
FAQs: Common Front Yard Landscaping Concerns
Yes—use compost or raised beds. Choose hardy plants that adapt to your native soil.
Absolutely. Scale down plant sizes, use vertical features, and create one strong focal point.
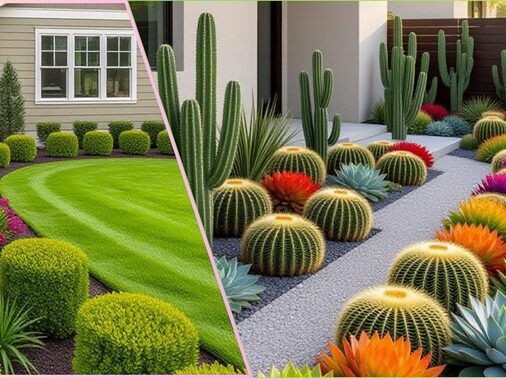
Select drought-tolerant plants, use mulch, and focus on evergreen structure for year-round interest.
Begin with one high-impact feature: new lighting, a tree, or crisp bed edging. Small changes make a big difference.
Work in phases. Start with design and hardscape, then plant gradually. Reuse materials and shop seasonally.
Planting too close to the house
Ignoring drainage
No clear edges
Overbuying high-maintenance plants
Forgetting lighting
Conclusion
Your front yard is more than a patch of grass—it’s your home’s first impression. With a few intentional steps, you can make it shine.
Start small: define your vision, establish clean structure, and layer plants thoughtfully. Add one standout feature this week, and watch your curb appeal rise instantly.