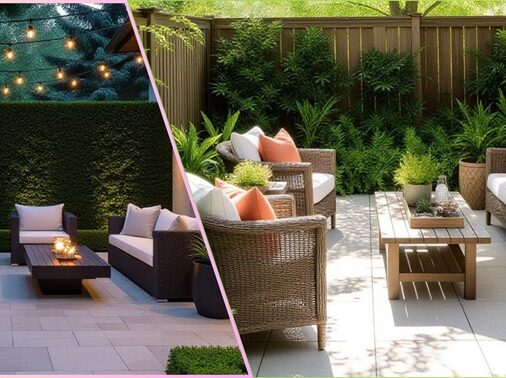
Imagine stepping outside your door and into a garden that feels like it was tailor-made for your life — places to sip coffee, pathways that invite slow wandering, shady nooks, buzzing pollinators, and structure that remains beautiful even in winter. That’s what proper landscape design plans can deliver — transforming ordinary yards into personalized sanctuaries.
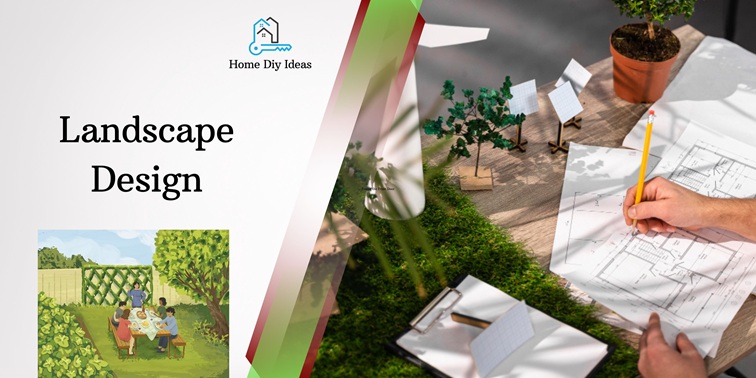
Having designed residential gardens for over a decade and coached hundreds of homeowners through their first landscape projects, I’ve developed a systematic approach to creating outdoor spaces that work. In this comprehensive guide, I’ll walk you through my exact process for developing effective landscape design plans — step by step — equipping you with professional checklists, sketching techniques, and the confidence to transform your yard.
Whether you’re starting with a blank slate or renovating an existing garden, you’ll discover how to create landscape design plans that not only look beautiful but function seamlessly for your lifestyle — the kind of professional plans that make contractors nod in approval.
Why Most Landscape Design Plans Fail (And How to Avoid Common Pitfalls)
Before we dive into the step-by-step process, understanding why many garden plans underdeliver is crucial. Through my consulting work, I’ve identified three recurring issues:
- Underestimating mature plant sizes leading to overcrowded beds within two years
- Neglecting seasonal changes in sun patterns and water drainage
- Prioritizing aesthetics over functionality — creating beautiful but unusable spaces
The methodology below addresses these issues systematically, ensuring your landscape design plans remain beautiful and functional for years.
🛠️ Step 1: Clarify Your Vision & Goals
Before sketching a single line, you need to get clear about why this garden matters to you. Many beginner guides jump to site analysis, but without vision, everything feels disjointed. Your landscape design plans must reflect your lifestyle, not just follow trends.
- Start with lifestyle questions
- How will you use the space? (Entertaining, relaxing, gardening, play area, yoga, bird watching)
- Who uses it? (Kids, pets, elders, individuals with mobility considerations)
- How much time/energy will you invest in upkeep? (Low-maintenance vs. high-involvement gardening)
- Collect visual inspiration
Create a mood board (Pinterest, magazines, garden catalogs). Look for recurring motifs: color themes, planting styles (formal, cottage, modern, native, xeriscape). I recommend creating both digital and physical inspiration boards. - Define guiding principles
Choose 3–5 words that describe your ideal garden: e.g. “tranquil,” “simplicity,” “pollinator-friendly,” “year-round interest.” These become your decision filters throughout the landscape planning process. - Set measurable goals
- Desired percentage of lawn vs planting bed (consider sustainable alternatives to traditional grass)
- Number of seating spots or focal features
- Seasonal interest targets (e.g. winter evergreen, spring blooms, autumn color)
- Wildlife habitat goals (specific pollinators or birds you want to attract)
- Budget & phasing
Decide whether you’ll build the garden all at once or in stages (e.g. Phase 1: paths & structure; Phase 2: planting). This prevents overwhelm and rework down the line. I recommend allocating 15-20% of your budget for unexpected expenses.
Why this stage matters: It ensures your landscape design plans are driven by purpose, not whim. Many garden plans fail because they lack this clarity. From my experience, homeowners who skip this step often create beautiful but impractical spaces that don’t serve their daily needs.
Step 2: Site Inventory & Analysis (Mapping What Already Exists)
This is where you switch from dreaming to reality. You need a precise map of your yard and its conditions to inform the design. Proper site analysis separates amateur landscape design plans from professional ones.
A. Measure & Sketch the Base Map
- Measure all existing elements: house, walls, fences, trees, hardscapes, utility lines. I use a 100-foot tape measure for accuracy.
- Use graph paper or digital software (I’ll share suggestions below). For beginners, 1/8 inch scale (where 1/8″ = 1′) works well for residential properties.
- Label north direction, dimensions, and scale. Include property lines and building setbacks.
B. Analyze Solar Patterns & Microclimates
- Over several days, note where the sun falls (full sun, partial shade, deep shade). I recommend tracking this in 2-hour intervals.
- Track seasonal sun angles (winter vs summer shadows). The sun’s path changes significantly — a spot sunny in July might be shaded in December.
- Identify microclimates (warmer walls, wind funnels, damp low spots). South-facing walls can be significantly warmer, allowing you to grow plants beyond your typical zone.
- Mark spots of reflected heat (paved paths, walls) and frost pockets where cold air settles.
C. Soil, Drainage & Slope
- Test soil: pH, texture (clay, loam, sandy). Your local extension service often provides affordable testing.

- Observe water flow during rain: where does water pool or rush? Simple percolation tests help determine drainage rates.
- Spot hidden drainage or erosion issues. Look for water stains on foundations or washed-out areas.
D. Existing Flora & Fauna
- Inventory plants you want to keep (trees, shrubs, perennials). Assess their health and placement.
- Note invasive plants or problematic species that need removal.
- Identify wildlife corridors or existing beneficial habitat worth preserving.
E. Utilities & Constraints
- Mark underground utilities, overhead wires, septic, gas lines. Always call 811 before digging.
- Note setbacks or zoning restrictions from local ordinances.
- Identify view corridors (what you want to highlight or screen). Consider both internal and external views.
Result: A comprehensive site analysis diagram layered over your base map — this detailed understanding becomes the foundation for all subsequent landscape design decisions.
Step 3: Conceptual Layouts & Functional Zones
Now you begin drafting how your garden will feel and flow. This is where your vision meets the site constraints. In my practice, I’ve found that spending adequate time on conceptual planning prevents costly changes during implementation.
A. Define Garden “Rooms” & Circulation
- Divide your garden into functional zones (e.g. dining, play, flower borders, vegetable plot). Consider noise levels and privacy needs for each area.
- Use soft boundaries (hedges, shrubs) or hard edges (low walls, paths) to define spaces without completely enclosing them.
- Plan how people move: connect zones via intuitive pathways. Main routes should be at least 4 feet wide for comfortable two-person walking.
B. Overlay Concept Diagrams (Bubble Diagrams)
- On tracing copies of your base map, sketch circles or blobs showing where zones might sit. Don’t worry about precise shapes initially.
- Focus on relationships between spaces — which zones should connect directly, which need separation.
C. Establish Focal Points & Sightlines
- Choose focal elements: sculpture, specimen tree, water feature, pergola. Limit major focal points to avoid visual competition.
- Use view corridors and forced perspective to lead the eye. Frame desirable views and screen undesirable ones.
- Consider how views from inside the house enter the garden (windows, doors). Position key elements where they’ll be seen from frequently used rooms.
D. Pattern & Proportion in Design
Here’s where I bring in a slightly deeper design layer that most DIY landscape design plans overlook:
- Use pattern language / living structure ideas (borrowed from Christopher Alexander) to ensure your garden has coherence at all scales (many small things + some large anchors)
- Think in proportions: ratio of solid (wall or structure) vs void (planting space), curve vs straight lines. The golden ratio (1:1.618) can create naturally pleasing proportions.
- Introduce repetition and rhythm (repeat plant forms or materials) for unity. Repeat key elements at intervals to create visual rhythm.
E. Hardscape Skeleton First
Once zones make sense, which many amateur landscape design plans get backwards:
- Lay in hardscape elements (paths, patios, walls, steps, structures) on the plan. These are the most permanent and costly elements.
- Use the hardscape to define room edges and circulation before planting begins. Paths should logically connect destinations.
- Ensure hardscapes respect drainage, slope, and foundation distances. Maintain proper grading away from structures.
Most competitor articles mention hardscapes but rarely prioritize them. I emphasize doing hardscapes first so planting doesn’t have to be moved later — a lesson learned from costly early-career mistakes.
Step 4: Planting Design & Material Palette (The Softscape Phase)
With your structural skeleton in place, now you fill it with living elements. This is where landscape design plans truly come alive, combining art and horticulture.

A. Plant Layering & Structure
- Think in three vertical planes:
• Overhead (trees/arbors) — provides scale and enclosure
• Middle (shrubs, tall perennials) — creates garden structure
• Groundplane (groundcovers, bulbs, edging plants) — unifies the design - Plan plant groupings/drifts (3, 5, 7 in clusters) to create scale and visual rhythm. Odd numbers generally look more natural.
- Use contrast (leaf texture, color, height) while keeping harmony with your guiding principles. Contrast creates visual interest, repetition creates unity.
B. Plant Selection Strategy
- Favor native or well-adapted species to reduce water/fertilizer needs. Shape and Form+1 Natives support local ecosystems and typically require less maintenance.
- Incorporate seasonal interest: early spring bulbs, summer bloomers, fall color, winter structure. Aim for at least three seasons of visual interest.
- Use companion planting principles (e.g. avoid plants that compete, pair those that support pollinators). Some plant combinations actually enhance each other’s growth.
- Mark root spread / mature size on your plan to avoid overcrowding. This is the most common mistake in DIY landscape design plans.
C. Material Palette & Color Palette
- Limit your hardscape materials (e.g. pavers, gravel, decking) to 2–3 complementary textures. Too many materials create visual chaos.
- Choose plant colors that align with your mood: e.g. a muted palette vs bold jewel tones. Cool colors recede, warm colors advance in the landscape.
- Use accent materials (pots, sculptures) sparingly as punctuation. These should complement, not compete with, the overall design.
D. Planting Plan & Schedule
- Convert your conceptual plan into a detailed planting plan (each plant labeled). Include botanical names to avoid nursery confusion.
- Create a plant list / schedule (common name, botanical name, quantity, spacing). This becomes your shopping list and installation guide.
- Schedule planting in phases or seasons (e.g. early trees, then shrubs, then perennials). Some plants establish better at specific times.
- Plan irrigation zones and watering schedule accordingly. Group plants with similar water needs together.
Step 5: Implementation, Phasing & Budget Tracking
This is where many people stall. Having a design is one thing — executing it is where real work happens. Proper implementation separates dreamers from successful garden creators.
A. Create a Phased Implementation Plan
Break your project into logical chunks. Based on my project management experience, here’s a typical phasing strategy:
| Phase | Tasks | Approx Cost Allocation |
| Phase 1 | Hardscapes (paths, walls, drainage) | 30% |
| Phase 2 | Structural planting (trees, shrubs) | 25% |
| Phase 3 | Perennials, bulbs, groundcovers | 20% |
| Phase 4 | Details (ornamental features, lighting) | 15% |
| Phase 5 | Mulching, maintenance, future infill | 10% |
You can adapt percentages per your priorities. I recommend completing each phase fully before moving to the next to maintain momentum.
B. Contractor vs DIY Decision
- Use your detailed plans as a communication tool. Clear plans reduce misunderstandings and change orders.
- For quoting, ask contractors to break costs per phase or zone. This allows you to compare bids accurately.
- Use your site plan + planting list to get multiple bids (reduces markups). Three detailed bids typically provide good market comparison.
C. Budget Tracking & Contingency
- Always add a 10–15% buffer for unexpected costs (soil amendments, delivery, labor). Landscape projects often reveal surprises once digging begins.
- Track each line: hardscape, plants, lighting, irrigation, labor, accessories. Use a simple spreadsheet for visibility.
- Update your budget weekly during implementation to avoid cost overruns.
D. Monitor & Adjust During Build
- Before planting, do a “dry fit” of paths and beds (stake them out physically). Walk the proposed layout to test flow.
- Walk the site at various times to observe sunlight, access, views. Make adjustments before permanent installation.
- Be ready to adjust minor positions — don’t be rigid. The plan should guide, not strangle, the process.
Step 6: Maintenance Strategy & Evolution Over Time
A garden is a living thing — it must age gracefully. A design that requires constant intervention will break down. The best landscape design plans consider long-term care from the beginning.

A. Maintenance Plan Checklist
- Pruning schedule (trees, shrubs, perennials) — different plants need pruning at different times
- Mulching refresh cycle — typically annually or biennially depending on mulch type
- Soil amendment schedule (compost, organic fertilizer) — healthy soil reduces pest and disease issues
- Weed & pest monitoring — early intervention is more effective and less toxic
- Irrigation management (drip, smart timers) — adjust seasonally as plants establish and weather changes
B. Long-Term Goals & Revisions
- Every 3–5 years, revisit your plan: some plants may outgrow, shade may change, zones may need rethinking. Gardens evolve.
- Leave space for future features (e.g. add a small pavilion later). Good landscape design plans allow for evolution.
- Monitor plant performance and swap out underperformers. Even professionals can’t predict exactly how every plant will perform in your specific conditions.
C. Seasonal Tasks Table
| Season | Key Tasks |
| Spring | Clean up debris, mulch refresh, plant new additions, check irrigation lines, divide perennials |
| Summer | Water judiciously, deadhead, monitor for pests, stake tall plants, harvest vegetables |
| Autumn | Cut back perennials, plant fall bulbs, leaf cleanup, winterize irrigation, plant trees/shrubs |
| Winter | Assess structure, prune trees, plan for next year, protect tender plants, clean tools |
Professional Insights: Advanced Considerations for Landscape Design Plans
Beyond the basic steps, here are professional considerations that elevate ordinary landscape design plans to exceptional ones:
Sustainability & Ecological Function
- Incorporate rainwater harvesting through swales, rain gardens, or collection systems
- Create habitat layers to support diverse wildlife from soil microorganisms to pollinators and birds
- Use permeable paving materials to reduce runoff and recharge groundwater
- Select plants based on their ecological relationships, not just aesthetics
Accessibility & Universal Design
- Ensure main paths are at least 36 inches wide with firm, stable surfaces
- Incorporate resting spots every 30-50 feet on longer paths
- Consider raised beds for easier access for those with mobility challenges
- Provide sensory experiences for all abilities — fragrance, sound, texture
Tools & Resources: Sketching, Software & Visualization Tools
To bring your landscape design plans to life, here are tools I’ve found invaluable through years of testing various options:
- Hand drawing with tracing paper / graph paper — fast, tactile, great for early concepting and client collaboration
- Free & paid garden design apps (e.g. SmartDraw, Garden Planner, VegPlotter) Ideal Home — good for beginners but often lack precision
- GIS / satellite imagery tools (e.g. Google Earth, local GIS) — excellent for understanding context and solar patterns
- 3D rendering software (SketchUp, Lumion) — good for client presentations and spatial understanding
- Plant database tools (like USDA Plant Database or regional botanical sites) — essential for accurate plant selection
- Living structure / pattern design reference (to refine your forms) — Christopher Alexander’s work provides timeless principles
Use the tool that matches your comfort level. I often start freehand, then import into a digital tool to refine. Each method has strengths — analog for creativity, digital for precision.
Quick Checklists for Your Landscape Plan
Pre-Design Checklist
- Mood board and guiding words
- Functional program (zones & uses)
- Base map with measurements & features
- Solar/microclimate sketch
- Soil and drainage assessment
- Utilities and constraints mapped
Design Phase Checklist
- Concept bubble diagrams
- Hardscape skeleton laid out
- Circulation & sightlines tested
- Focal elements placed
- Plant layering concept
- Material and color palette chosen
- Draft planting plan & list
Implementation Checklist
- Phased build schedule
- Contractor bids with phases
- Budget tracking sheet
- Dry-fitting paths & beds
- Plant delivery & staging plan
- Irrigation installed and tested
Maintenance Checklist
- Seasonal pruning schedule
- Mulch refresh dates
- Soil test / amendment schedule
- Pest & weed monitoring
- Yearly review & adaptation plan
Conclusion
Creating exceptional outdoor spaces requires more than just planting pretty flowers — it demands thoughtful landscape design plans that balance beauty, function, and sustainability. By following this comprehensive methodology, you’re not just designing a garden; you’re crafting an extension of your home that will evolve beautifully over time.
The most successful landscape design plans emerge from understanding both the art and science of gardening — combining your personal vision with site-specific conditions, structural planning with horticultural knowledge, and immediate impact with long-term sustainability.