In my years working in landscape design and installation, I’ve seen countless borders that look tidy for a season — and then shift, crack, or disappear entirely. Yet I’ve also installed many runs of plastic landscape edging that quietly do their job for years, with minimal fuss.
Plastic edging often gets dismissed as “cheap” or “temporary.” But when chosen well and installed properly, it becomes one of the most cost-effective, flexible, and durable ways to define garden beds, paths, turf edges, and more. In this article, I’ll walk you through everything I’ve learned: the good, the limitations, and how to make plastic edging perform like a pro.
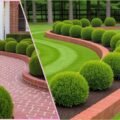
Why Use Plastic Landscape Edging?
Plastic landscape edging isn’t just about saving money. When installed properly, it’s a reliable and durable system for defining edges.
Advantages
- Affordable: Costs far less per linear foot than metal, stone, or brick.
- Flexible: Perfect for curves, circles, and natural shapes.
- Lightweight: Easy for one person to install without heavy tools.
- Resistant to rot or rust: Won’t decay or corrode like wood or metal.
- Quick to install: Can be completed in hours, not days.
- Visually clean: Creates a defined, polished boundary between lawn and beds.
Drawbacks to Keep in Mind
- Not as rigid: May bend under soil or mower pressure.
- UV degradation: Low-grade plastics can become brittle over time.
- Heaving in cold zones: Frost can lift edges if stakes are shallow.
- Less premium look: Not as upscale as metal or stone.
- Height limits: Shallow edging won’t stop aggressive turf roots.
Choosing the Right Plastic Landscape Edging
Here’s how I evaluate edging before installing it on any client property:
1. Material Quality
- Choose UV-stabilized or recycled HDPE for longevity.
- Look for ribbed or reinforced walls to resist bending.
2. Height & Depth
- For most lawns: 5 inches high minimum.
- At least 3–4 inches below ground for stable anchoring.
3. Shape & Format
- Coiled edging: Great for flowing curves.
- Segmented strips: Better for straight, controlled lines.
- Interlocking joints: Reduce separation over time.
4. Anchoring System
- Prefer edging with built-in stake channels or extra stake holes.
- Use durable stakes — plastic, metal, or rebar — spaced every 24–36 inches.
5. Color & Finish
- Black remains the go-to, but brown and gray options blend beautifully in natural landscapes.
6. Warranty & Brand Reliability
- A good indicator of quality: look for 10-year or longer warranties.
Design & Layout Best Practices
A successful border depends more on planning than on product choice.
Layout Tips
- Outline the shape with a hose or rope first.
- Order 10% extra length to cover overlaps and cuts.
- Avoid sharp curves — keep bends natural and gentle.
- Account for slope — anchor more deeply where the ground drops.
Trenching Guidelines
- Trench depth should allow half the edging to sit below grade.
- The top edge should sit ¼–½ inch above ground to prevent grass overgrowth.
- Compact soil on both sides after installation.
Staking Tips
- Space stakes 2–3 feet apart for straight runs.
- Use angled stakes on curves or slopes for added hold.
- Stake through overlaps to eliminate joint gaps.
Common Problems & How to Fix Them
| Problem | Cause | Fix |
| Edging bows or leans | Soil pressure or loose backfill | Add stakes or compact soil firmly |
| Gaps appear at joints | Poor connection or movement | Overlap sections and stake through both |
| Heaving during frost | Shallow trench or poor drainage | Install deeper or add gravel base |
| Cracks near stake holes | Thin plastic or overtightened stakes | Pre-drill holes and use flexible stakes |
| Fading or brittleness | Prolonged UV exposure | Use UV-protected edging and reapply protectant spray annually |
Maintenance Tips for Long Life
Plastic edging is low-maintenance, but small habits make a big difference:
- Inspect each spring for shifts, gaps, or loose stakes.
- Replace cracked pieces early to avoid soil washout.
- Keep mulch and soil slightly below the edging top.
- Trim carefully with string trimmers — avoid striking the edge.
- In sunny areas, apply a UV protectant every few years.
With these steps, a quality plastic edge can easily last 10–15 years or more.
Where Plastic Edging Works Best
Ideal Applications
- Garden beds and flower borders
- Pathway and walkway edges
- Vegetable gardens or tree rings
- Curved ornamental beds
- Temporary or low-budget landscape zones
Avoid in
- Driveways or heavy-traffic zones
- High-pressure soil areas
- Very steep slopes
- Ultra-premium or high-end formal gardens
Quick Installation Checklist
✅ Plan and mark layout
✅ Measure and order extra material
✅ Dig trench (3–4 in deep)
✅ Seat edging flush with line
✅ Stake securely every 2–3 ft
✅ Overlap joints and compact soil
✅ Backfill evenly and water lightly
✅ Final alignment check
FAQ — Homeowner Questions
Typically 8–15 years, depending on material quality and exposure.
Yes, if installed deep enough (4–5 inches below grade) and tightly joined.
Absolutely. Most homeowners can complete a standard yard in one afternoon.
Warm the edging slightly in the sun to make bending easier, or use pre-formed corner pieces.
Re-stake loose sections, compact surrounding soil, and refill any voids.
Conclusion
When installed with care, plastic landscape edging delivers a neat, professional finish that lasts for years — all at a fraction of the cost of metal or stone. It’s a practical choice for homeowners who want function, flexibility, and clean design lines without breaking the budget.
If you’re planning to refresh your garden or redesign your lawn edges, consider starting with a high-quality plastic edging system. With proper planning and installation, it’s one of the smartest landscape investments you can make.