A stunning pool area is more than just a place to swim; it’s an outdoor living room, a private resort, and the heart of your home. But achieving that perfect look requires more than just a collection of pretty images. As a landscape designer with over 15 years of experience, I know that the best pool landscape ideas seamlessly blend aesthetics with practicality, safety, and sustainability.
This comprehensive guide goes beyond surface-level inspiration. I’ll provide the field-tested strategies, step-by-step instructions, and detailed planning tools I use with my own clients. You’ll discover how to create a poolscape that not only looks magazine-worthy but also functions beautifully for your lifestyle, stands up to your local climate, and enhances your property’s value.
The Gap in Most Pool Landscaping Advice: What Others Leave Out
Many articles on pool landscape design offer generic inspiration without the actionable, expert-backed details homeowners truly need to succeed. Through my professional work, I’ve identified five critical areas where most online resources fall short. This guide is built to close these gaps with authority.
- Climate-Adapted Plant Science: Beyond just naming plants, I provide specific lists for different USDA hardiness zones, with crucial details on spacing, root depth to prevent pool damage, and seasonal behavior like leaf drop.
- Transparent, Phased Budgeting: I break down realistic costs and show you how to phase your project over time, making a luxury poolscape achievable without financial strain.
- Professional-Grade Lighting Plans: I detail exactly where to place lights for both safety and drama, including technical tips on voltage and circuit requirements.
- Integrated Safety Design: Learn how to incorporate essential safety features like fencing and non-slip surfaces in a way that enhances, rather than detracts from, your overall design vision.
- True Sustainability: Get actionable advice on water budgeting, EPA WaterSense principles for irrigation, and selecting native plants that support local ecosystems.
Phase 1: Foundational Planning — The 3 Pre-Dig Decisions
Rushing the planning phase is the most common mistake I see. A successful pool landscape begins long before the first plant goes in the ground. These three core decisions will set your entire project up for success.
- Define Your Primary Function: Is this a lively space for children and entertaining, or a serene retreat for adults? Your answer dictates the deck size, the need for storage (towels, toys), and the intensity of safety features.
- Conduct a Microclimate Analysis: Track the sun’s path and prevailing wind directions across your yard. This analysis is critical for placing shade structures, selecting sun-tolerant plants, and positioning seating areas for comfort. Also, note drainage and water runoff zones to avoid erosion.
- Establish Sightlines and Circulation Paths: Maintain clear views of the pool from key indoor areas like the kitchen for safety. Plan clear, logical paths between the house, pool, seating areas, and outdoor utilities to ensure a natural and intuitive flow.
Your Pre-Installation Walk-Through Checklist
- ✅ Map daily sun and wind patterns across your yard.
- ✅ Verify sightlines from primary house windows.
- ✅ Mark activity zones (e.g., lounge, dining, kids’ play).
- ✅ Ensure clear service access for pool equipment maintenance.
Phase 2: Hardscape Design — Building Style and Safety from the Ground Up
Your hardscape—the non-living elements like decking and patios—forms the backbone of your pool area. Material choice here is paramount for both aesthetics and safety.
Expert Material Selection Tips
- Permeable Pavers: I often recommend these to reduce stormwater runoff and minimize heat absorption, keeping the surface cooler on bare feet. This aligns with sustainable landscaping principles endorsed by the EPA.
- Non-Slip Finishes: Textured travertine, brushed concrete, or certain composite decking materials provide crucial traction in wet zones around the pool.
- Gentle Elevation Changes: Keep transitions between different zones (e.g., from pool deck to lawn) to a maximum of a half-inch to prevent tripping hazards.
Step-by-Step Pool Deck Layout Plan
- Establish a primary walking path (at least 3–4 feet wide) around the pool.
- Position a dining or lounge zone 8–12 feet back from the water’s edge to keep furniture and electronics out of the splash zone.
- Incorporate a dedicated maintenance access path (minimum 3 feet wide) leading to pool equipment for service technicians.
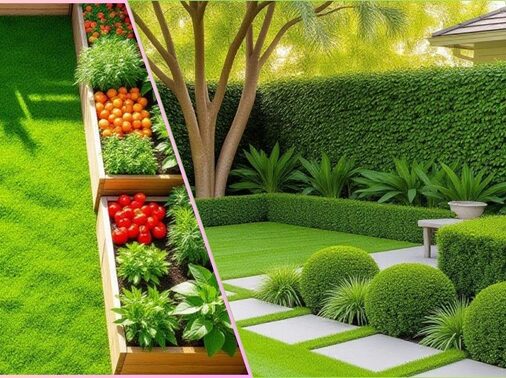
Phase 3: Planting & Softscaping — Curated Plans for Every Style
The right plants frame your pool and create the desired atmosphere. My approach focuses on selecting vegetation that suits your design style while minimizing maintenance and protecting your pool.
Tropical Resort Style (Lush & Vibrant)
- Signature Plants: Windmill Palm, Bird of Paradise, Colocasia (Elephant Ear).
- Pro Tip: Use large, weighted containers to control root systems and reduce debris. Group pots in odd-numbered clusters for a natural, curated rhythm.
Modern Minimalist Style (Clean & Structured)
- Signature Plants: Blue Agave, Mexican Feather Grass, Dwarf Boxwood.
- Pro Tip: Employ symmetrical spacing (3–4 feet on center) and insist on low-litter, sculptural species to maintain clean lines.
Native & Water-Wise Style (Eco-Conscious)
- Signature Plants: Consult your local agricultural extension, but often includes Sage, Yarrow, and native ornamental grasses.
- Pro Tip: Practice hydrozoning—grouping plants with similar water needs together—and install a smart drip irrigation system to conserve water.
Family-Friendly Style (Safe & Durable)
- Signature Plants: Columnar trees like ‘Sky Pencil’ Holly, sturdy evergreen hedges, and soft, durable groundcovers.
- Pro Tip: Strictly avoid fruiting or thorny plants near the pool deck, and steer clear of species with aggressive surface roots that can damage paving.
Poolside Plant Selection Quick-Reference Table
| Design Style | Plant Height & Role | Optimal Placement | Maintenance Level |
|---|---|---|---|
| Tropical | Tall focal points, mid-height texture | Containers & back borders | Moderate (regular watering, pruning) |
| Modern | Sculptural, low-growing accents | Geometric planter beds | Low (infrequent watering, minimal trim) |
| Native | Biodiversity, natural forms | Garden borders & slopes | Very Low (seasonal cutback, drought-tolerant) |
| Family | Privacy screening, soft barriers | Perimeter fencing lines | Low (seasonal pruning, low litter) |
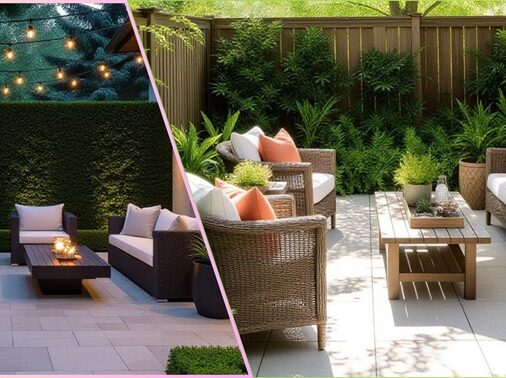
Phase 4: Ambient Features — Layering Light, Sound, and Water
Professional Pool Lighting Strategy
- The Three-Layer Method: For a truly professional effect, combine 1) Safety Lighting (path and step lights), 2) Ambient Lighting (soft illumination in dining areas), and 3) Accent Lighting (uplighting for trees or wall-washing).
- Safety Rule of Thumb: Ensure each step is clearly illuminated by a dedicated light source placed within 12–18 inches.
- Technical Power Tip: Always use a low-voltage LED system on GFCI (Ground Fault Circuit Interrupter) protected circuits for absolute safety and energy efficiency.
Integrating Sound & Water Features
- Invest in a high-quality, quiet, submersible pump for any fountains or waterfalls to avoid a distracting mechanical hum.
- Plan for equipment concealment from the start, using screened alcoves or dedicated utility boxes.
- For gentle ambient sound that masks neighborhood noise without overwhelming conversation, consider a small, self-contained bubbling urn or deck-level scupper.
Integrating Safety & Privacy — A Design-Centric Approach
Non-Negotiable Safety Fundamentals
- Pool Fencing: Install a barrier that complies with local codes, which often mandate a minimum height of 4 feet with self-closing, self-latching gates.
- Material Safety: As mentioned, prioritize non-slip materials in all wet deck zones to prevent slips and falls.
- Safety Equipment: Keep a shepherd’s hook, life ring, and first-aid kit in a highly visible and easily accessible location.
Elegant Privacy Solutions
- Create layered plant screens using a mix of tall, columnar trees and mid-height flowering shrubs for a soft, natural barrier.
- Incorporate decorative privacy panels made from wood, metal, or composite materials that double as artistic elements.
- Strategically position these screens to block specific neighboring sightlines while preserving desirable views within your own yard.
A Realistic, Phased Budget Plan for Homeowners
Breaking your project into phases makes it financially manageable and allows you to live in the space before making final decisions on certain elements.
Phase 1 — Core Construction (Months 0-3)
- Pool shell, coping, and primary decking installation.
- Essential electrical for primary lighting and pool equipment plumbing.
Phase 2 — Softscaping & Features (Months 3-12)
- Installation of planting beds, irrigation systems, and water features.
- Addition of core outdoor furniture and the completion of the lighting scheme.
Phase 3 — Finishing Touches (Months 12-24)
- Addition of pergolas or other shade structures, decorative privacy screens, and specialized accent lighting.
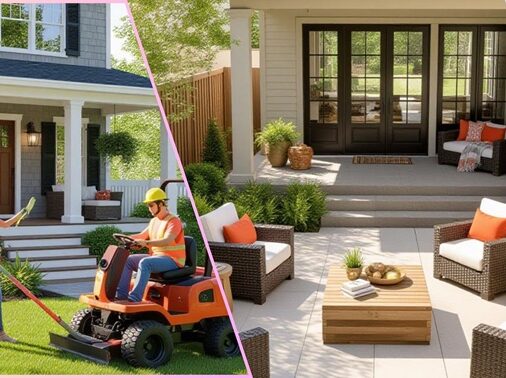
Practical Maintenance: A Simple Regimen for Lasting Beauty
Monthly Pool & Landscape Checklist
- Weekly Tasks: Skim the pool surface, test and balance water chemistry, and remove debris from skimmer baskets and the deck.
- Monthly Tasks: Backwash or clean the pool filter, inspect all lighting, and check the irrigation system for leaks or clogged emitters.
- Quarterly Tasks: Prune plants as needed, apply appropriate fertilizers, and adjust irrigation timers based on the season.
Water Conservation Strategies
- Install a dedicated drip irrigation system with a smart controller that adjusts watering based on weather conditions.
- Apply a 2-3 inch layer of mulch or use decorative gravel in planting beds to significantly reduce soil moisture evaporation.
- Selecting native and drought-resistant plants can reduce your landscape’s water consumption by up to 60% compared to a traditional lawn.
Expert Answers to Common Homeowner Questions
The best plants are low-litter, non-fruiting, and have non-invasive roots. I consistently recommend container-grown palms, agaves, dwarf ornamental grasses, or Liriope. Avoid trees with vigorous surface roots that can crack your deck, and plants that drop excessive flowers, fruit, or sap.
As a general rule, keep large trees at least 8–10 feet away from the pool’s edge to prevent root damage to the structure and plumbing. Smaller, tidy shrubs with less aggressive root systems can be placed as close as 3 feet.
Yes, retrofitting a waterfall is a common project. For a small waterfall or fountain, it typically involves light excavation to run new plumbing and electrical lines. My key advice is to always plan for an accessible, screened service alcove for the pump and filter to simplify future maintenance.
The secret is subtle integration. Use recessed, in-deck step lights, low-profile LED strips under the pool coping, and warm-temperature uplights concealed behind plantings. By choosing the right fixtures and placements, you can achieve a safe, well-lit environment that enhances the mood rather than ruining it.
This varies widely by region and scope, but for professional design and installation of foundational plantings, basic hardscaping, and a good lighting system, homeowners should plan for an investment of $10,000 to $15,000. Projects involving extensive custom hardscaping, natural stone, water features, and shade structures often range from $25,000 to $40,000 or more.
Your Next Step: From Inspired Ideas to Your Own Backyard Paradise
Exceptional pool landscape ideas are not about chasing fleeting trends; they are about intentional design that reflects your unique lifestyle. By focusing on a solid plan, choosing the right materials and plants for your climate, and integrating features that provide both beauty and function, you can transform your backyard into a lasting oasis.
Use this guide as your roadmap. Start with the planning checklist, define your budget, and build your dream poolscape one phase at a time. For personalized guidance, consider consulting with a professional landscape designer in your area who can translate these principles into a custom plan for your home. Now, step outside and start imagining the possibilities.