After designing dozens of residential landscapes, I can tell you that stone is the secret weapon of savvy homeowners. It’s not just about aesthetics; it’s about building a resilient, low-maintenance, and beautiful outdoor space. I’m drawn to the permanence of a well-placed boulder, the satisfying crunch of a gravel path, and the brilliant way rocks solve problems like drainage and soil erosion.
This guide distills my hands-on experience into actionable, design-forward landscaping ideas with rocks. You’ll find step-by-step projects, trusted plant pairings, and professional tips you can use to transform your yard, blending beauty with hardworking function.
Quick Decision Table: Matching Stone to Your Project’s Needs
Choosing the right stone is the first step to a successful project. This table breaks down the most common types used in residential landscaping.
| Stone Type | Best Uses | Pros | Cons | Cost & Maintenance |
|---|---|---|---|---|
| Pea Gravel | Paths, drainage layers, play areas, informal patios | Affordable, easy to install, excellent drainage | Moves underfoot; requires sturdy edging | Low cost, occasional raking to maintain |
| River Rock | Dry creek beds, garden beds, accent borders, drainage ditches | Smooth, natural look, very low erosion, varied sizes | Heavy, difficult to walk on, can be pricey | Medium cost, virtually no maintenance |
| Flagstone | Patios, walkways, stepping paths, retaining wall caps | Extremely durable, flat for walking, timeless style | Heavy; requires a solid base; can be slippery when wet | Medium–high cost, low maintenance (may need weeding in joints) |
| Boulders | Focal points, natural seating, erosion control on slopes | Major visual impact, permanent, stabilizes soil | Requires equipment (like a dolly) to place | High cost per stone, minimal maintenance |
| Decomposed Granite (DG) | Paths, informal seating areas, between flagstones | Compacts well, natural look, permeable | Can wash away or track indoors if not stabilized | Low–medium cost, may need occasional topping up |
| Crushed Stone | Base material for patios and paths, driveways, xeriscaping | Locks together when compacted, very affordable, great drainage | Angular edges can be rough on bare feet | Low cost, long-lasting with proper base |
Five Step-by-Step Rock Landscaping Projects (with Pro Insights)
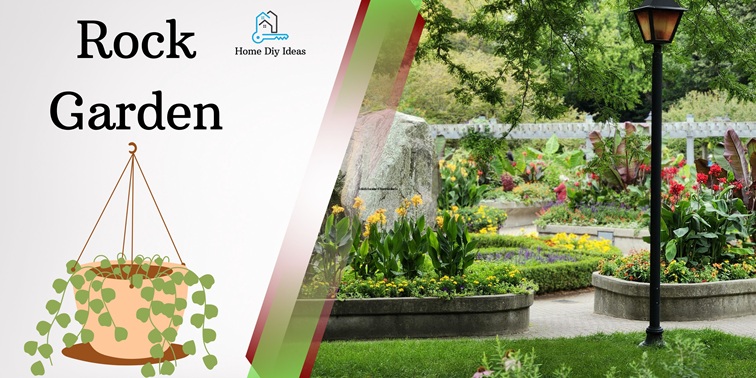
1) Rock Garden — Create a Low-Water Alpine Retreat
A rock garden is the pinnacle of low-maintenance, drought-tolerant landscaping. It mimics alpine environments where plants thrive in rocky, well-drained soil.
Materials Needed: Large anchor rocks, mid-sized stones, pea gravel or crushed granite, well-draining soil mix (sandy loam), drought-tolerant plants.
Steps:
- Site Selection & Prep: Pick a sunny, well-drained area. Remove all grass and weeds, then mound the soil slightly to improve drainage and create visual interest.
- Place Anchor Rocks: Position your largest boulders first, burying at least one-third of their height for a natural, grounded look. These define the garden’s structure.
- Create Planting Pockets: Arrange mid-sized stones around the boulders, leaving gaps filled with your soil mix. These pockets are where your plants will live.
- Planting: Introduce your drought-tolerant plants into the pockets. Think succulents like Sedum and Sempervivum, or alpine plants like Thyme and Aubrieta.
- Apply Gravel Mulch: Spread a 2-inch layer of small gravel or crushed granite around the plants and rocks. This suppresses weeds, retains soil moisture, and completes the natural aesthetic.
Pro Tip from the Field: Cluster rocks in odd numbers (groups of 3, 5, or 7) and vary their sizes for a more natural, less-manicured appearance. Tilt a few rocks slightly downward to channel rainwater to your plants’ roots.
2) Dry Creek Bed — Beauty with a Drainage Purpose
A dry creek bed is a functional solution for diverting water runoff that looks like a natural part of the landscape. It’s one of the most requested features for solving soggy yard problems.
Materials Needed: Landscape fabric, assorted river rock (small to very large), shovel, gravel for base layer.
Steps:
- Trace the Water’s Path: Observe where water flows during a heavy rain. Outline a meandering trench that follows this natural path, widening it slightly at curves to slow water flow.
- Excavate: Dig a trench 4–8 inches deep with sloping sides. The depth depends on your water volume; deeper for more significant runoff.
- Line with Fabric: Lay a permeable landscape fabric to prevent weeds from growing up through the rocks.
- Build the Base: Add a 2-3 inch layer of coarse gravel or crushed stone for primary drainage.
- Place River Rock: Start with the largest rocks along the edges to define the banks. Fill the center with medium and small river rock, creating a natural, streambed look.
- Plant the Banks: Soften the edges with ornamental grasses (like Switchgrass or Blue Fescue) and moisture-loving plants that will enjoy the occasional extra water.
Why It Works: This feature prevents soil erosion, channels water away from your foundation, and eliminates a muddy problem area, all while adding a stunning, naturalistic element to your garden.
3) Rock Mulch — The Ultimate Low-Maintenance Ground Cover
Swapping organic mulch for rock around trees and shrubs is a game-changer for reducing upkeep. It’s permanent, excellent for heat-loving plants, and superb for weed suppression.
Materials Needed: Landscape fabric (optional), gravel or small river rock, edging material (metal or stone).
Steps:
- Clear the Area: Remove grass and weeds in a 3–4 foot diameter circle around the plant.
- Lay Fabric (Use Judiciously): For total weed prevention, use landscape fabric. However, I often skip it in planted beds as it prevents self-seeding of desirable plants and can compromise soil health over time. It’s best for purely decorative, non-planted areas.
- Install Edging: Use a metal or stone edging to create a clean border and prevent rocks from spilling onto the lawn.
- Apply Rock Layer: Spread a 2–3 inch layer of your chosen rock. Avoid going deeper, as this can hinder soil aeration.
- Keep Trunks Clear: Maintain a 3–4 inch gap between the rock and the trunk of trees or stems of shrubs to prevent moisture buildup and rot.
Pro Tip: Match rock color to your home’s exterior tones. For example, use warm brown and tan river rock with a brick house, or gray granite with a modern, gray-sided home. Be mindful that rocks absorb heat, so this technique is best for established, drought-tolerant plants.
4) Flagstone Path or Patio — Timeless Elegance Underfoot
A flagstone patio or path is an investment that pays off in durability and beauty. The key to longevity is in the base preparation.
Materials Needed: Flagstone, crushed stone (for base), coarse sand, plate compactor (rentable), polymeric sand or groundcover plants for joints.
Steps:
- Excavate: Dig out the area to a depth of 6–8 inches, ensuring a slight slope (1-2%) away from structures for drainage.
- Build the Base: Add a 4-inch layer of crushed stone. Use a plate compactor to thoroughly compact it. This is the most critical step to prevent settling and shifting.
- Add Sand Layer: Spread a 1-inch layer of coarse, sharp sand over the compacted base. Use a long board to screed it perfectly level.
- Lay the Flagstone: Place the stones, leaving joints between ½ inch to 2 inches wide. Use a rubber mallet to set them firmly in the sand.
- Fill the Joints: For a clean, low-maintenance finish, sweep polymeric sand into the joints and mist with water to activate. For a softer, rustic look, plant low-growing creepers like creeping thyme or Irish moss.
Design Insight: Tight joints with polymeric sand create a modern, clean look. Wider joints planted with creeping thyme offer a charming, fragrant, and eco-friendly alternative that supports pollinators.
5) Boulder Accents — Sculptural and Functional Focal Points
Boulders are the sculptures of the natural world. A single, well-placed boulder can serve as a stunning focal point, while a cluster can define a space and control erosion on a slope.
Materials Needed: 1-3 large boulders, hand truck or dolly, shovel.
Steps:
- Choose the Right Scale: Select boulders that are proportional to your yard. A common mistake is using stones that are too small, which can look accidental.
- Excavate a Base: Dig a shallow depression where the boulder will sit.
- Set for Realism: Place the boulder, burying at least one-quarter to one-third of its volume. This makes it look as if it’s emerging from the earth, not just dropped on top.
- Create a Grouping: For visual impact, cluster two or three boulders of varying sizes together, as they would appear in nature.
- Complement with Planting: Surround with ornamental grasses, low-growing shrubs, or a bed of gravel to help the boulders feel integrated into the landscape.
Essential Rock Landscaping Checklist
✅ Measure and Sketch: Plan your project on paper first, noting dimensions.
✅ Call 811: Have all underground utilities marked at least a few days before you dig. This is non-negotiable for safety.
✅ Calculate Materials: Use online calculators to determine tons of rock or cubic yards of base material needed.
✅ Prep for Drainage: Always ensure your project slopes away from your home’s foundation.
✅ Edge Gravel Areas: Install physical edging to keep gravel in place and maintain clean lines.
✅ Inspect Annually: Check for shifting stones, washout, or weed growth after winter and heavy rains.
Expert Plant Pairings That Thrive with Rocks
The right plants will make your rock features sing. Choose plants that appreciate the same well-drained conditions that rocks provide.
| Full Sun & Dry Conditions | Partial Shade | Accent Plants for Boulders & Structure |
|---|---|---|
| Sedum (Stonecrop) | Heuchera (Coral Bells) | Blue Fescue Grass |
| Sempervivum (Hens & Chicks) | Hosta | Dwarf Conifers |
| Lavender | Ferns (e.g., Japanese Painted Fern) | Maiden Grass (Miscanthus) |
| Russian Sage | Brunnera | Fountain Grass (Pennisetum) |
| Creeping Phlox | Astilbe | Japanese Maple (as a backdrop) |
Designer’s Secret: Combine textures for maximum impact. The fine, feathery blades of ornamental grasses soften the hard edges of boulders, while the bold, geometric forms of succulents create a striking modern contrast. For detailed growing information, consult your local Master Gardener program.
Realistic Cost Overview for Rock Landscaping
Costs vary widely by region, stone type, and project complexity. These are national averages to help you budget.
| Project Type | DIY Cost Range (Materials) | Pro Installation Range |
|---|---|---|
| Small Rock Bed (e.g., around a tree) | $200 – $1,000 | $1,000 – $2,500 |
| Flagstone Path (15-30 sq. ft.) | $500 – $2,000 | $2,500 – $5,000+ |
| Dry Creek Bed (20-30 linear ft.) | $1,000 – $3,000 | $3,000 – $6,000+ |
| Boulder Accents (1-3 boulders, placed) | $500 – $1,500 | $2,000+ |
DIY vs. Professional: A Realistic Comparison
| Project | DIY-Friendly? | When to Hire a Pro |
|---|---|---|
| Small Rock Bed / Mulching | ✅ Yes | — |
| Pathway / Patio | ✅ Yes, with good physical fitness and planning | For large areas, complex leveling, or if you’re unsure about base preparation |
| Dry Creek Bed | ✅ Yes | For managing large volumes of water, deep excavation, or connecting to municipal drainage |
| Boulder Placement | ⚠️ Maybe (small boulders) | For any boulder requiring equipment to move. Safety first. |
| Retaining Wall | ❌ No | Always hire a professional for structural walls over 2-3 feet. |
Conclusion
Stone is more than just a decoration; it’s the foundation of a thoughtful, resilient landscape. It provides year-round structure, solves practical problems, and drastically cuts down on maintenance, allowing you to spend more time enjoying your yard and less time working in it.
The best way to start is to pick one project that excites you—whether it’s a simple gravel bed around a tree or a meandering flagstone path—and dedicate a weekend to it. The tactile process of working with stone is incredibly rewarding, and the result is a permanent feature that adds unique character and value to your property. This is why landscape designers have long considered stone the essential “bones of the garden.”