You’ve got a compact backyard. You dream of lush planting, cozy seating, maybe a water feature — but space feels tight. I’ve designed dozens of small outdoor spaces over my years as a landscape professional, and I promise: size is no barrier to beauty or function. With thoughtful strategy, you can turn those limited square feet into a layered, inviting, multi-use backyard.
In this article, I’ll share advanced approaches to small backyard landscaping that go beyond the usual lists. I’ll point out gaps I found in top-ranking competitor articles, add technical nuance, and walk you through actionable, design-savvy ideas you can implement (or discuss with a pro).
Principles First: How to Think About a Small Backyard
Before you pick plants or pavers, these guiding ideas will set you up for success.
Start with Clarity: Purpose + Circulation
- Define your priority functions. What’s non-negotiable? A dining area? A play zone for kids? A prayer corner? List 2–3 and rank them.
- Draw a bubble diagram. Even a rough sketch helps you see where paths, seating, beds, and “empty space” will live.
- Plan circulation paths before planting. Make sure pathways don’t get pinched by overhanging foliage later.
- Leave breathing room. Don’t pack every corner — small negative spaces give visual rest and improve flow.
Use Vertical & Layering to Recover Lost Ground
When lateral space is scarce, always look upward and inward.
- Vertical gardens / green walls / trellises. Train climbers or vines on fences or walls to free soil-level bed space.
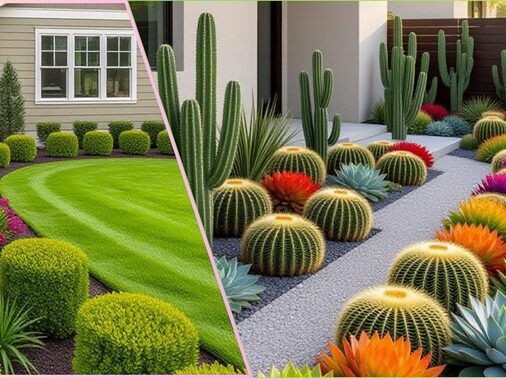
- Tiered planting (layering). For example: tall shrubs in back, mid-height perennials in middle, low groundcovers or gravel in front.
- Hanging planters and wall containers. Use fences, walls, pergola beams, or vertical posts to host containers.
Hardscape as Framework, Not Filler
Hardscaping gives structure — but in small yards, every hardscape element must pull double duty.
- Multifunctional surfaces. A paved patio that also serves as a stepping zone or pergola base.
- Stepping stones over gravel. Rather than continuous slab paving, break it up with gravel or low groundcover between stones to soften edges.
- Sunken or raised patios. Creating slight level changes (e.g., 4–6” step down) helps carve distinct zones visually.
- Permeable materials. Use permeable pavers or crushed stone so water infiltrates rather than puddles.
Leverage Focal Points & Depth Tricks
- Mirrors or reflecting surfaces. A wall mirror or polished metal panel can visually “extend” the space.
- Strong focal tree or specimen plant. One vertical accent draws the eye inward.
- Overlapping sightlines. Create small “vistas” — e.g. frame a garden nook through arch openings so your eye continues beyond the foreground.
- Color & repetition. A restrained palette (2–3 hues) repeated across planters and hardscape gives cohesion and depth.
Practical Ideas & Design Modules
Here are tested “modules” you can mix and match depending on your priorities.
Cozy Dining / Bistro Nook Module
- Use banquette seating built into planters — seating wall that doubles as a planting ledge.
- Use a folding or drop-leaf table to free up space when not in use.
- Overhead shade sails or pergola with climbing vines reduce visual bulk while providing comfort.
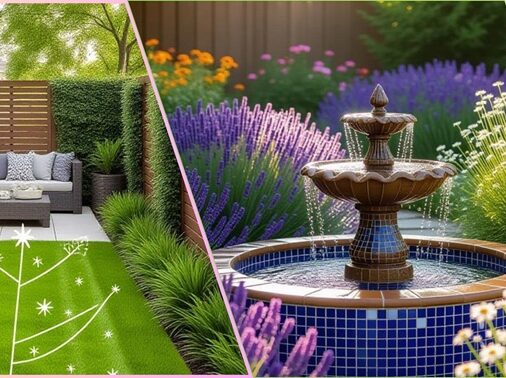
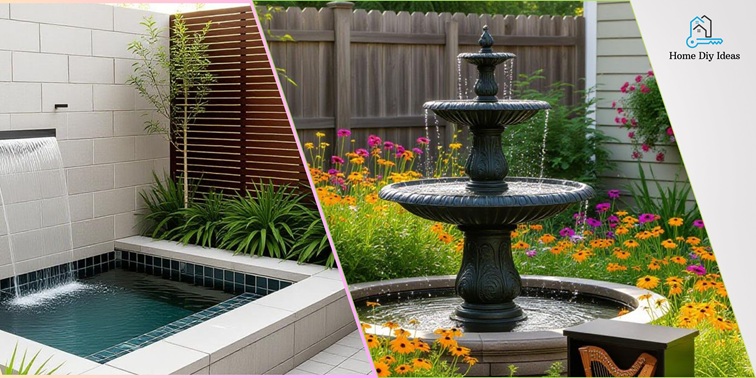
Water Feature & Sound Module
- Wall-mounted cascading water as a vertical accent (small footprint).
- Reflecting trough along a wall, shallow depth.
- Use subtle bubbling urns or ceramic fountains — low scale, multi-function (sound + focal point).
Play / Kids Zone Module
- Artificial turf strip (narrow width) or rubberized surface integrated along boundary or side yard.
- Foldable play bench or storage bench that doubles as seating.
- Pocket garden boxes along wall edges for kids to plant or play with soil.
Kitchen Garden Module
- Use vertical planter towers or pocket planters along wall to maximize produce per square foot.
- Tiered raised beds (front-to-back staggered) to allow more planting depth in a narrow footprint.
- Hydroponic troughs or planters that rest on ledges or raised platforms to free ground space.
Plant Palette & Technical Considerations
Choosing the right plants is vital; wrong choices can overwhelm a small space. Here’s a professional framework.
Scale-Appropriate Plant Strategy
- Start with a structural backbone. Thin columnar shrubs or small trees (e.g. dwarf varieties)
- Add midlayer shrubs or perennials. Use species that stay within 3–4 ft height if walkway boxes run narrow.
- Ground layer / groundcovers. Low-covering species or creeping textures (Thyme, creeping phlox, sedges)
- Accent / seasonal fillers. Potted annuals or seasonal color that can be swapped each year
Rule of thumb: No plant’s mature size should intrude more than 15–20% into circulation paths.
Microclimate & Soil Considerations
- Shade & sun mapping. Track where your yard is sunlit, dappled, or shady during spring, summer, winter.
- Wind corridors. In tight yards, wind can funnel through openings — use shrubs or screens on leeward sides.
- Drainage. Ensure slope or grading ensures water runs away from the house. Use French drains or gravel trenches if water pools.
- Soil quality & depth. In small backyards, topsoil is often shallow. Use raised beds or amend soil with compost to boost fertility.
Maintenance Planning (Don’t Overgrow Yourself)
- Irrigation planning early. Drip lines and micro-emitters are essential; small gardens can dry out fast.
- Access for pruning / maintenance. Always leave 18–24” behind major shrub mass for pruning access.
- Mulch schedule & replenishment. Organic mulch helps suppress weeds and hold moisture; replenish annually.
- Annual “reset” pass. Each year, assign one weekend to edit away overgrowth, replant, re-edge.
Checklist: Before You Begin
- Measured plan + sketch with functions
- Sun / shade / wind study
- Soil test (pH, texture, depth)
- Drainage / grading evaluation
- Hardscape footprint plan
- Plant palette draft
- Irrigation plan
- Budget + phasing roadmap
Sample Layout Table: Two Different Small Backyards
| Scenario | Dimensions | Key Modules | Suggested Strategy |
| Narrow 12′ × 30′ lot | 12 ft wide × 30 ft long | Walkway + herb wall + seating + planters | Use central strip walking pavers, vertical herb wall on one long side, banquette seating at far end |
| Square 20′ × 20′ backyard | 20 ft × 20 ft | Dining + water feature + planting + daybed | Use a central patio with reflective water trough at one end, layered planting around perimeter, cozy daybed under arbor |
Common Homeowner Questions
Yes, but a minimal one. Use narrow strips or shaped inlays. For very small spaces, low-mow grass or turf might be better than full-scale lawn.
Plenty — with careful species selection (ferns, hostas, shade-tolerant shrubs). But balance with sufficient “light corridors” so darker corners don’t become mossy.
If the feature is flowing (i.e. continuous circulation) or has a pump, it minimizes standing water. Also cover or net small static features, or convert them to recirculating systems.
Start with hardscape “bones” first (paths, patios, drainage) because planting must adapt around them.
Break your project into phases: (1) layout and drainage, (2) hardscape, (3) structural planting, (4) accent planting & furniture. Fund each phase gradually.
Conclusion
I invite you to see your small backyard not as a constraint but as a canvas for thoughtful design. If you start with strong structure, layering logic, and plant-scale awareness, you’ll unlock every inch. Want help sketching your plan or picking the right plant palette for your climate? I’m happy to review your layout or suggest tailored designs — just share your dimensions and sun/shade map, and we’ll go from there. Let’s make your small backyard feel expansive, lush, and fully yours.