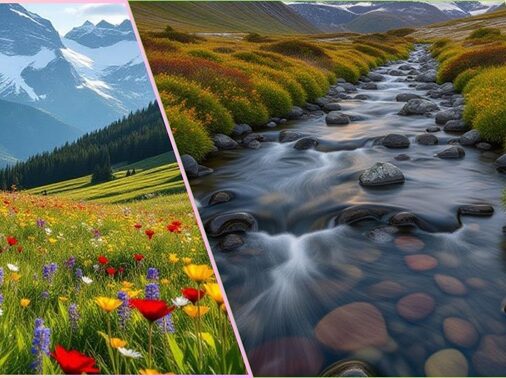
Watercolor painting can feel intimidating at first—especially when you’re trying to capture the depth and beauty of a landscape. But once you understand the basics, watercolor landscape easy techniques can become second nature. In this guide, I’ll share beginner-friendly methods, composition secrets, and watercolor tips I wish I knew when I first started painting natural scenery.
This article combines insights from top art educators and watercolor pros, but I’ve added my own personal touches—simple steps that make complex scenes manageable even for first-timers.
Why Watercolor Landscapes Are Ideal for Beginners
Unlike oils or acrylics, watercolor offers spontaneity—you can capture a sunrise or mountain scene with fluid ease. Plus, mistakes can turn into creative opportunities (something every beginner loves).
Here’s why watercolor landscapes are beginner-friendly:
- Minimal setup: Just paper, brushes, paints, and water.
- Expressive effects: Perfect for skies, trees, and reflections.
- Fast results: You can complete a painting in an hour or less.
- Relaxing process: The natural blending encourages mindfulness and creativity.
Getting Started: Materials You’ll Need
Before painting your first landscape, gather the right tools. I recommend investing in decent-quality supplies to avoid frustration later.
| Item | Recommendation | Beginner Tip |
| Paper | 140 lb (300 gsm) cold-pressed watercolor paper | Heavier paper prevents warping |
| Brushes | Round sizes 6, 10, and flat size 12 | Synthetic brushes work fine for starters |
| Paints | Basic 12-color set (Winsor & Newton Cotman or similar) | Focus on learning color mixing |
| Palette | Plastic mixing tray or white ceramic plate | Easy to clean and mix colors on |
| Water | Two jars (one clean, one dirty) | Keeps colors vibrant |
Step-by-Step: Painting a Simple Watercolor Landscape
Step 1: Plan Your Composition
I like to start by lightly sketching a horizon line—this anchors your composition. Decide on your focal point (a mountain, tree, or lake). Keep it simple.
Tip: Use the rule of thirds—place the main subject slightly off-center for balance.
Step 2: Paint the Sky First
Wet the top third of your paper with clean water, then drop in diluted blue. Let gravity help blend the tones naturally.
Pro tip: Add hints of pink or yellow near the horizon for a sunrise effect.
Step 3: Add Distant Elements
Once the sky dries, paint light blue-gray mountains or hills using a wet-on-dry technique. The lack of water keeps edges sharp and creates depth.
Step 4: Define Midground and Foreground
Mix greens and browns to paint trees, fields, or water reflections. Use a flat brush to suggest grass textures.
Try this mix:
- Green + Burnt Sienna = Natural, earthy foliage
- Blue + Yellow Ochre = Soft, muted greenery
Step 5: Add Details and Highlights
Once your layers are dry, use a smaller brush to add branches, path lines, or waves. Lift paint gently with tissue to create highlights like sunlight or clouds.
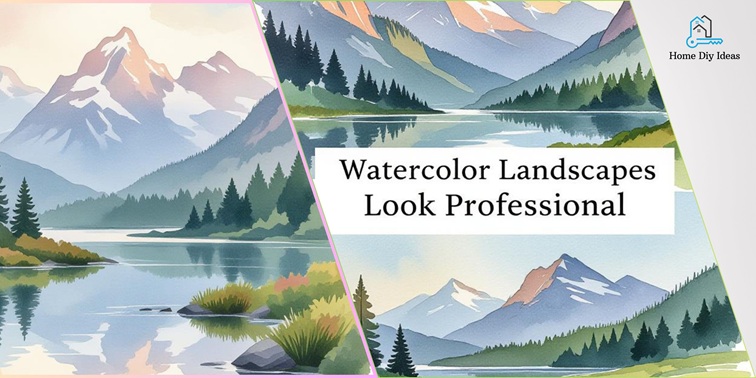
How to Make Your Watercolor Landscapes Look Professional
Here are the small tricks that make a big difference:
- Vary values: Contrast light and dark for realism.
- Limit your palette: Too many colors muddy your scene.
- Work light to dark: It’s easier to deepen tones than lighten them.
- Use layering (glazing): Build depth gradually.
- Let accidents work: Water blooms and uneven washes can add texture.
Common Mistakes Beginners Should Avoid
| Mistake | How to Fix It |
| Overworking the paper | Stop when colors look blended—less is more |
| Using too much water | Blot your brush and layer gradually |
| Ignoring perspective | Keep distant objects lighter and less detailed |
| Forgetting to dry layers | Wait between stages to prevent color bleeding |
Practice Ideas for Easy Watercolor Landscapes
When you’re ready to experiment, try these beginner projects:
- Sunset over mountains: Warm-to-cool gradients and silhouette trees.
- Lake reflection: Flip your landscape vertically for mirrored water.
- Forest path: Light filtering through tall trees.
- Beach scene: Use sand tones and gentle waves.
These scenes help you practice color transitions, layering, and texture—all key watercolor techniques.
Bonus: Quick Watercolor Mixing Chart for Landscapes
| Scene Element | Suggested Mix | Notes |
| Sky | Cobalt Blue + Water | Add a hint of Rose Madder for warmth |
| Grass | Sap Green + Burnt Umber | Avoid using pure green—it looks unnatural |
| Mountains | Ultramarine + Payne’s Gray | Great for distant ridges |
| Water | Cerulean Blue + Viridian | Reflects sky tones best |
| Sand/Soil | Yellow Ochre + Light Red | Adjust water ratio for texture |
Bringing It All Together
Painting a watercolor landscape easy style doesn’t mean cutting corners—it’s about simplifying the process so you can focus on creativity rather than perfection. Each brushstroke builds your confidence and helps you understand how water, pigment, and paper interact.
If you’re just starting out, choose small scenes, paint often, and most importantly—enjoy the journey. Watercolor landscapes teach patience and perspective, not just painting.
FAQs About Easy Watercolor Landscapes
Start with a simple sky, mountain, and lake composition—it teaches color blending and layering.
It depends on the effect. More water = softer blends. Less water = stronger color and control.
No—regular paper buckles and absorbs unevenly. Always use thick, textured watercolor paper.
Typically 5–10 minutes. Make sure the surface feels dry before adding new color.
A round brush gives flexibility for washes and details. Flat brushes are great for skies and fields.
Conclusion
If you’ve been waiting to try watercolor landscapes, now’s the time. With the right mindset, a few good brushes, and these simple steps, you’ll soon capture the beauty of nature on paper—one wash at a time.