
If you’re looking to transform your yard into a bright, fresh, and low-maintenance space, using white stone landscaping is one of the most effective ways. As someone who’s experimented with a variety of outdoor materials, I can confidently say that white stone—whether gravel, pebbles, or marble chips—adds instant elegance and structure.
In this guide, I’ll walk you through why it works, how to design with it, and actionable steps to create a polished, lasting outdoor look.
Why White Stone Landscaping Works
Here’s why I love recommending white stone in outdoor designs:
- Reflects Light, Brightens Space: White and pale stones reflect sunlight, visually enlarging outdoor areas.
- Clean, Modern Aesthetic: The neutral tone provides a crisp base that makes plants and architectural elements stand out.
- Low-Maintenance Surface: Unlike mulch, stones don’t decay or blow away.
- Weed and Erosion Control: With a proper barrier, white stone suppresses weeds and helps stabilize slopes.
- Design Flexibility: Whether you prefer a modern courtyard, Zen garden, or Mediterranean style, white stone blends in seamlessly.
Step-by-Step Guide to White Stone Landscaping
Step 1: Plan Your Design
Before ordering materials, plan your layout carefully.
Checklist:
- Measure the total area (length × width).
- Decide the depth — typically 2–4 inches of stone works best.
- Assess sunlight, drainage, and slope.
- Choose zones: pathway, border, rock bed, patio base, or plant cover.
- Define your style: modern minimal, rustic, or coastal bright.
Step 2: Choose the Right Type of White Stone
Not all white stones are equal. Each type offers a different texture and tone.
| Stone Type | Appearance | Best Use |
| Fine white gravel | Small and uniform | Pathways, general ground cover |
| White pebbles | Smooth and rounded | Around planters, water features |
| White cobbles / boulders | Large and irregular | Focal points, edging |
| Marble or limestone chips | Bright, reflective white | Contemporary designs, patio surrounds |
Pro Tip: Stick to one or two complementary types to maintain visual consistency.
Step 3: Prepare the Ground
A clean, stable base ensures your landscape stays beautiful for years.
- Remove grass, roots, and weeds.
- Level and grade the area for drainage.
- Lay a weed barrier fabric and secure edges firmly.
- Install edging (metal, wood, or stone) to contain the white stone.
- Add a compacted base layer (optional for walkways).
Step 4: Spread and Shape the White Stone
- Pour the stones evenly across the surface.
- Rake them smooth to the chosen depth.
- For walkways, lightly compact the surface for stability.
- Add stepping stones or pavers for contrast.
- Finish with lighting accents to make the white stones glow at dusk.
Step 5: Add Plants and Accents
White stone provides a neutral backdrop that enhances foliage color and shape.
Plant Pairing Ideas:
- Dark green evergreens or hedges for contrast
- Burgundy or purple foliage (e.g., loropetalum, cordyline)
- Silver-toned plants (e.g., lavender, dusty miller) for harmony
- Grasses and succulents for a minimalist feel
Accent Elements:
- Sculptural boulders or garden art
- Modern planters in black or concrete tones
- Water features surrounded by white pebbles
- Warm garden lighting for evening ambience
Step 6: Maintain Your White Stone Landscaping
White stone is durable but benefits from simple upkeep.
Maintenance Checklist:
- Monthly: Blow or sweep away leaves and debris.
- Quarterly: Rinse stones with water to remove dust or dirt.
- Annually: Top up areas where stones have settled.
- Weed Control: Check fabric edges and re-anchor if needed.
- Cleaning: For stains, use mild detergent or diluted vinegar and rinse thoroughly.
Tip: Avoid mixing mulch near white stone areas—dark mulch can easily stain the surface.
Step 7: Budget and Sustainability Tips
- Initial Cost: White stone costs more than mulch but lasts years longer.
- Sourcing: Choose locally quarried stones to reduce transport costs.
- Quantity Buffer: Order about 10% extra for touch-ups and future maintenance.
- Eco Benefit: Reusable, non-toxic, and erosion-resistant—great for sustainable designs.
White Stone Landscaping Ideas by Area
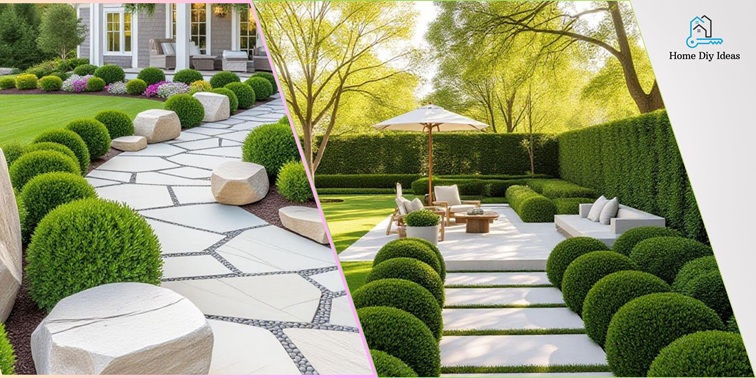
1. Pathways and Walkways
A white stone path bordered by greenery creates contrast and guides the eye naturally through your garden.
2. Front-Yard Beds
Bright white stone around shrubs and flowering plants adds sharp curb appeal that lasts all year.
3. Patio Surrounds
Use white gravel or marble chips around pavers for a light, open feel. It reflects natural light beautifully.
4. Zen or Minimalist Gardens
Rake fine white gravel into simple patterns for a calming, meditative atmosphere.
5. Focal Features
Frame sculptures, fountains, or trees with white stone borders for a striking statement effect.
FAQs About White Stone Landscaping
No. White stones reflect heat rather than absorbing it, keeping surrounding areas cooler.
They can show dirt more than darker stones, but occasional washing keeps them bright.
Use a high-quality weed barrier and secure all seams and edges tightly.
Fine gravel or small pebbles (10–15 mm) create a stable, walkable surface.
Install edging and lightly compact the surface after laying the stones.
Yes. They handle heat and rain well but may need occasional rinsing in humid regions.
Conclusion
White stone landscaping brings brightness, structure, and low-maintenance beauty to any outdoor space. Whether you’re updating a front-yard bed or designing a minimalist courtyard, this material offers both function and timeless appeal.
If you’re new to it, start small—perhaps a pathway or a section around a tree—and expand as you fall in love with its clean, modern look. With thoughtful planning and care, your white stone landscape can stay stunning for years to come.


